The Ultimate Commuter Bike Setup: Essential Features for Daily Riders
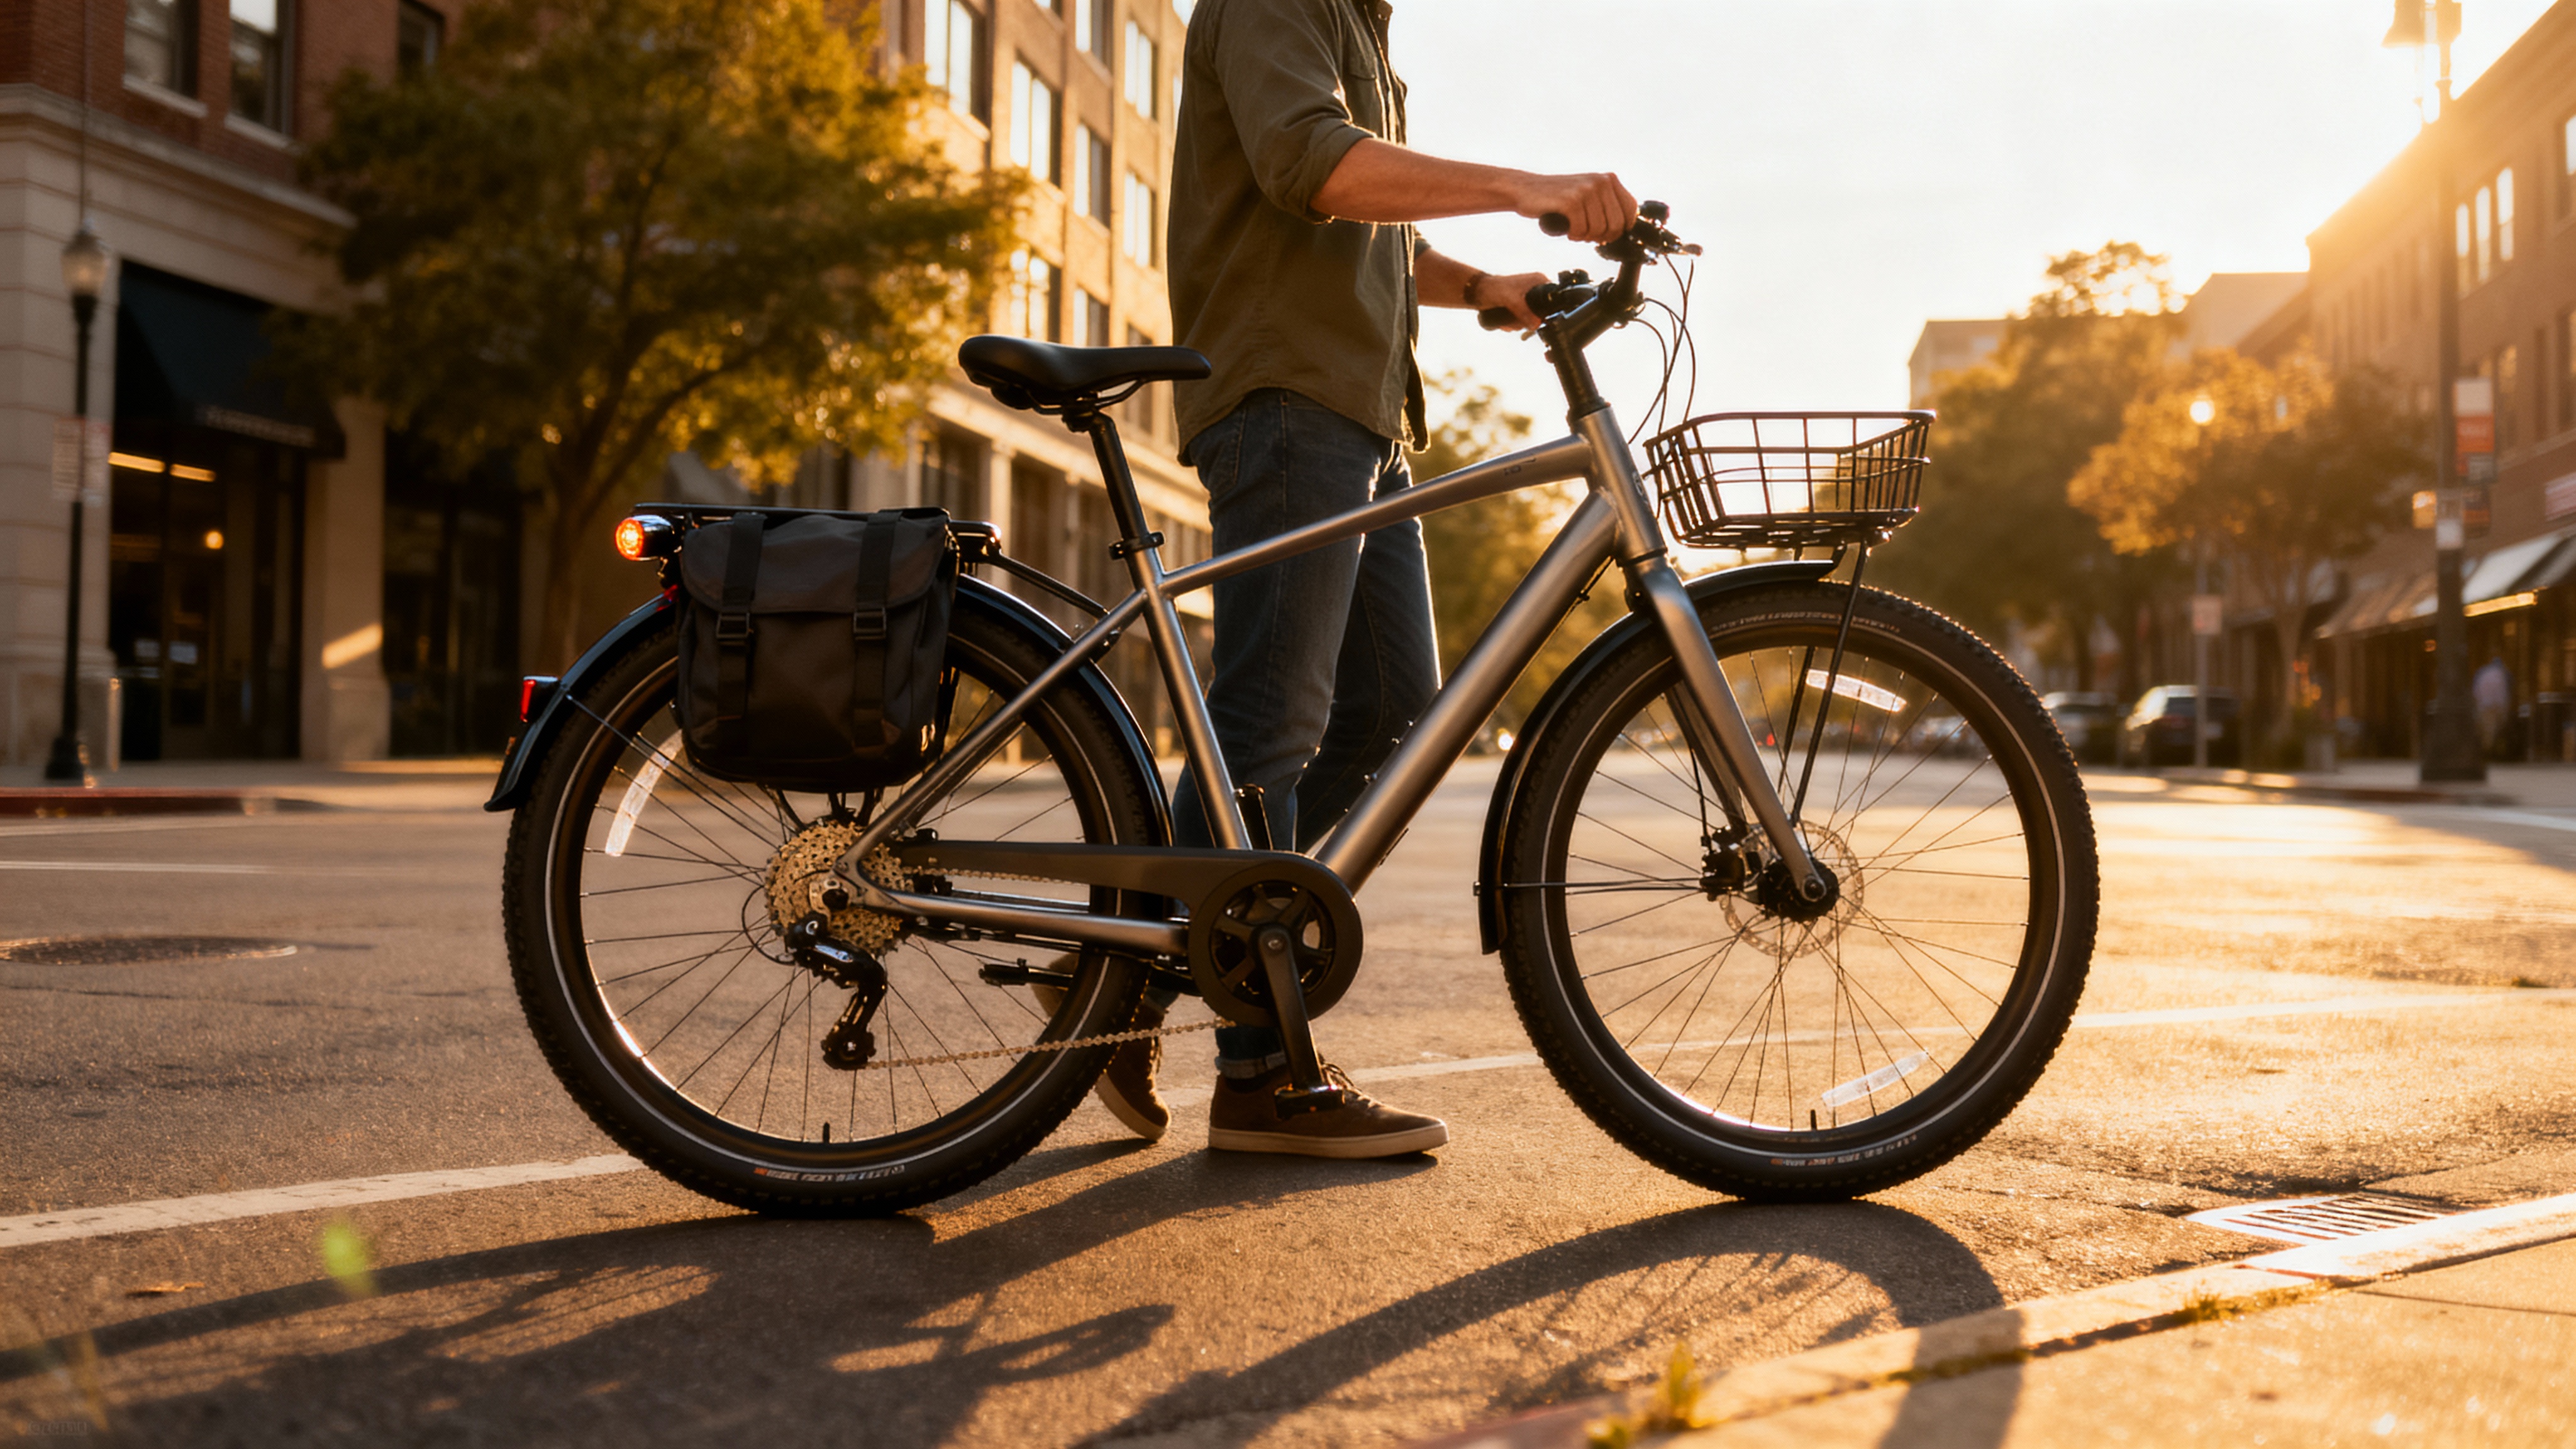
Commuting by bike transforms your daily journey from a stress-inducing ordeal into an energizing start to your workday. You’ll skip traffic jams, save money on gas and parking, get exercise without carving out gym time, and arrive at work alert rather than frustrated. Yet the difference between loving your bike commute and dreading it comes down to having the right setup.
A proper commuter bike isn’t just any bicycle with a basket thrown on—it’s a carefully configured system designed around reliability, comfort, and utility. According to research from urban transportation studies, cities investing in protected bike lanes see a 71% increase in bicycle commuting within three years, creating safer experiences that make proper bike setup even more valuable.
This comprehensive guide walks you through every essential element of building the ultimate commuter bike setup, from choosing the right base bike to selecting accessories that genuinely improve your daily ride.
Choosing Your Commuter Bike Foundation
Before diving into accessories and modifications, you need the right foundation. The best commuter bike balances three critical elements: utility, durability, and comfort.
Understanding the Commuter’s Triangle
The best commuter bike frameworks emphasize evaluating bikes through what experts call “the Commuter’s Triangle”—a framework balancing utility (cargo capacity, weather protection, and integration points), durability (component quality, frame robustness, and maintenance requirements), and comfort (riding position, vibration damping, and ergonomics).
Your personal perfect balance depends on your specific commute. A five-mile flat urban route requires different optimization than a hilly 15-mile suburban commute.
Bike Type Considerations
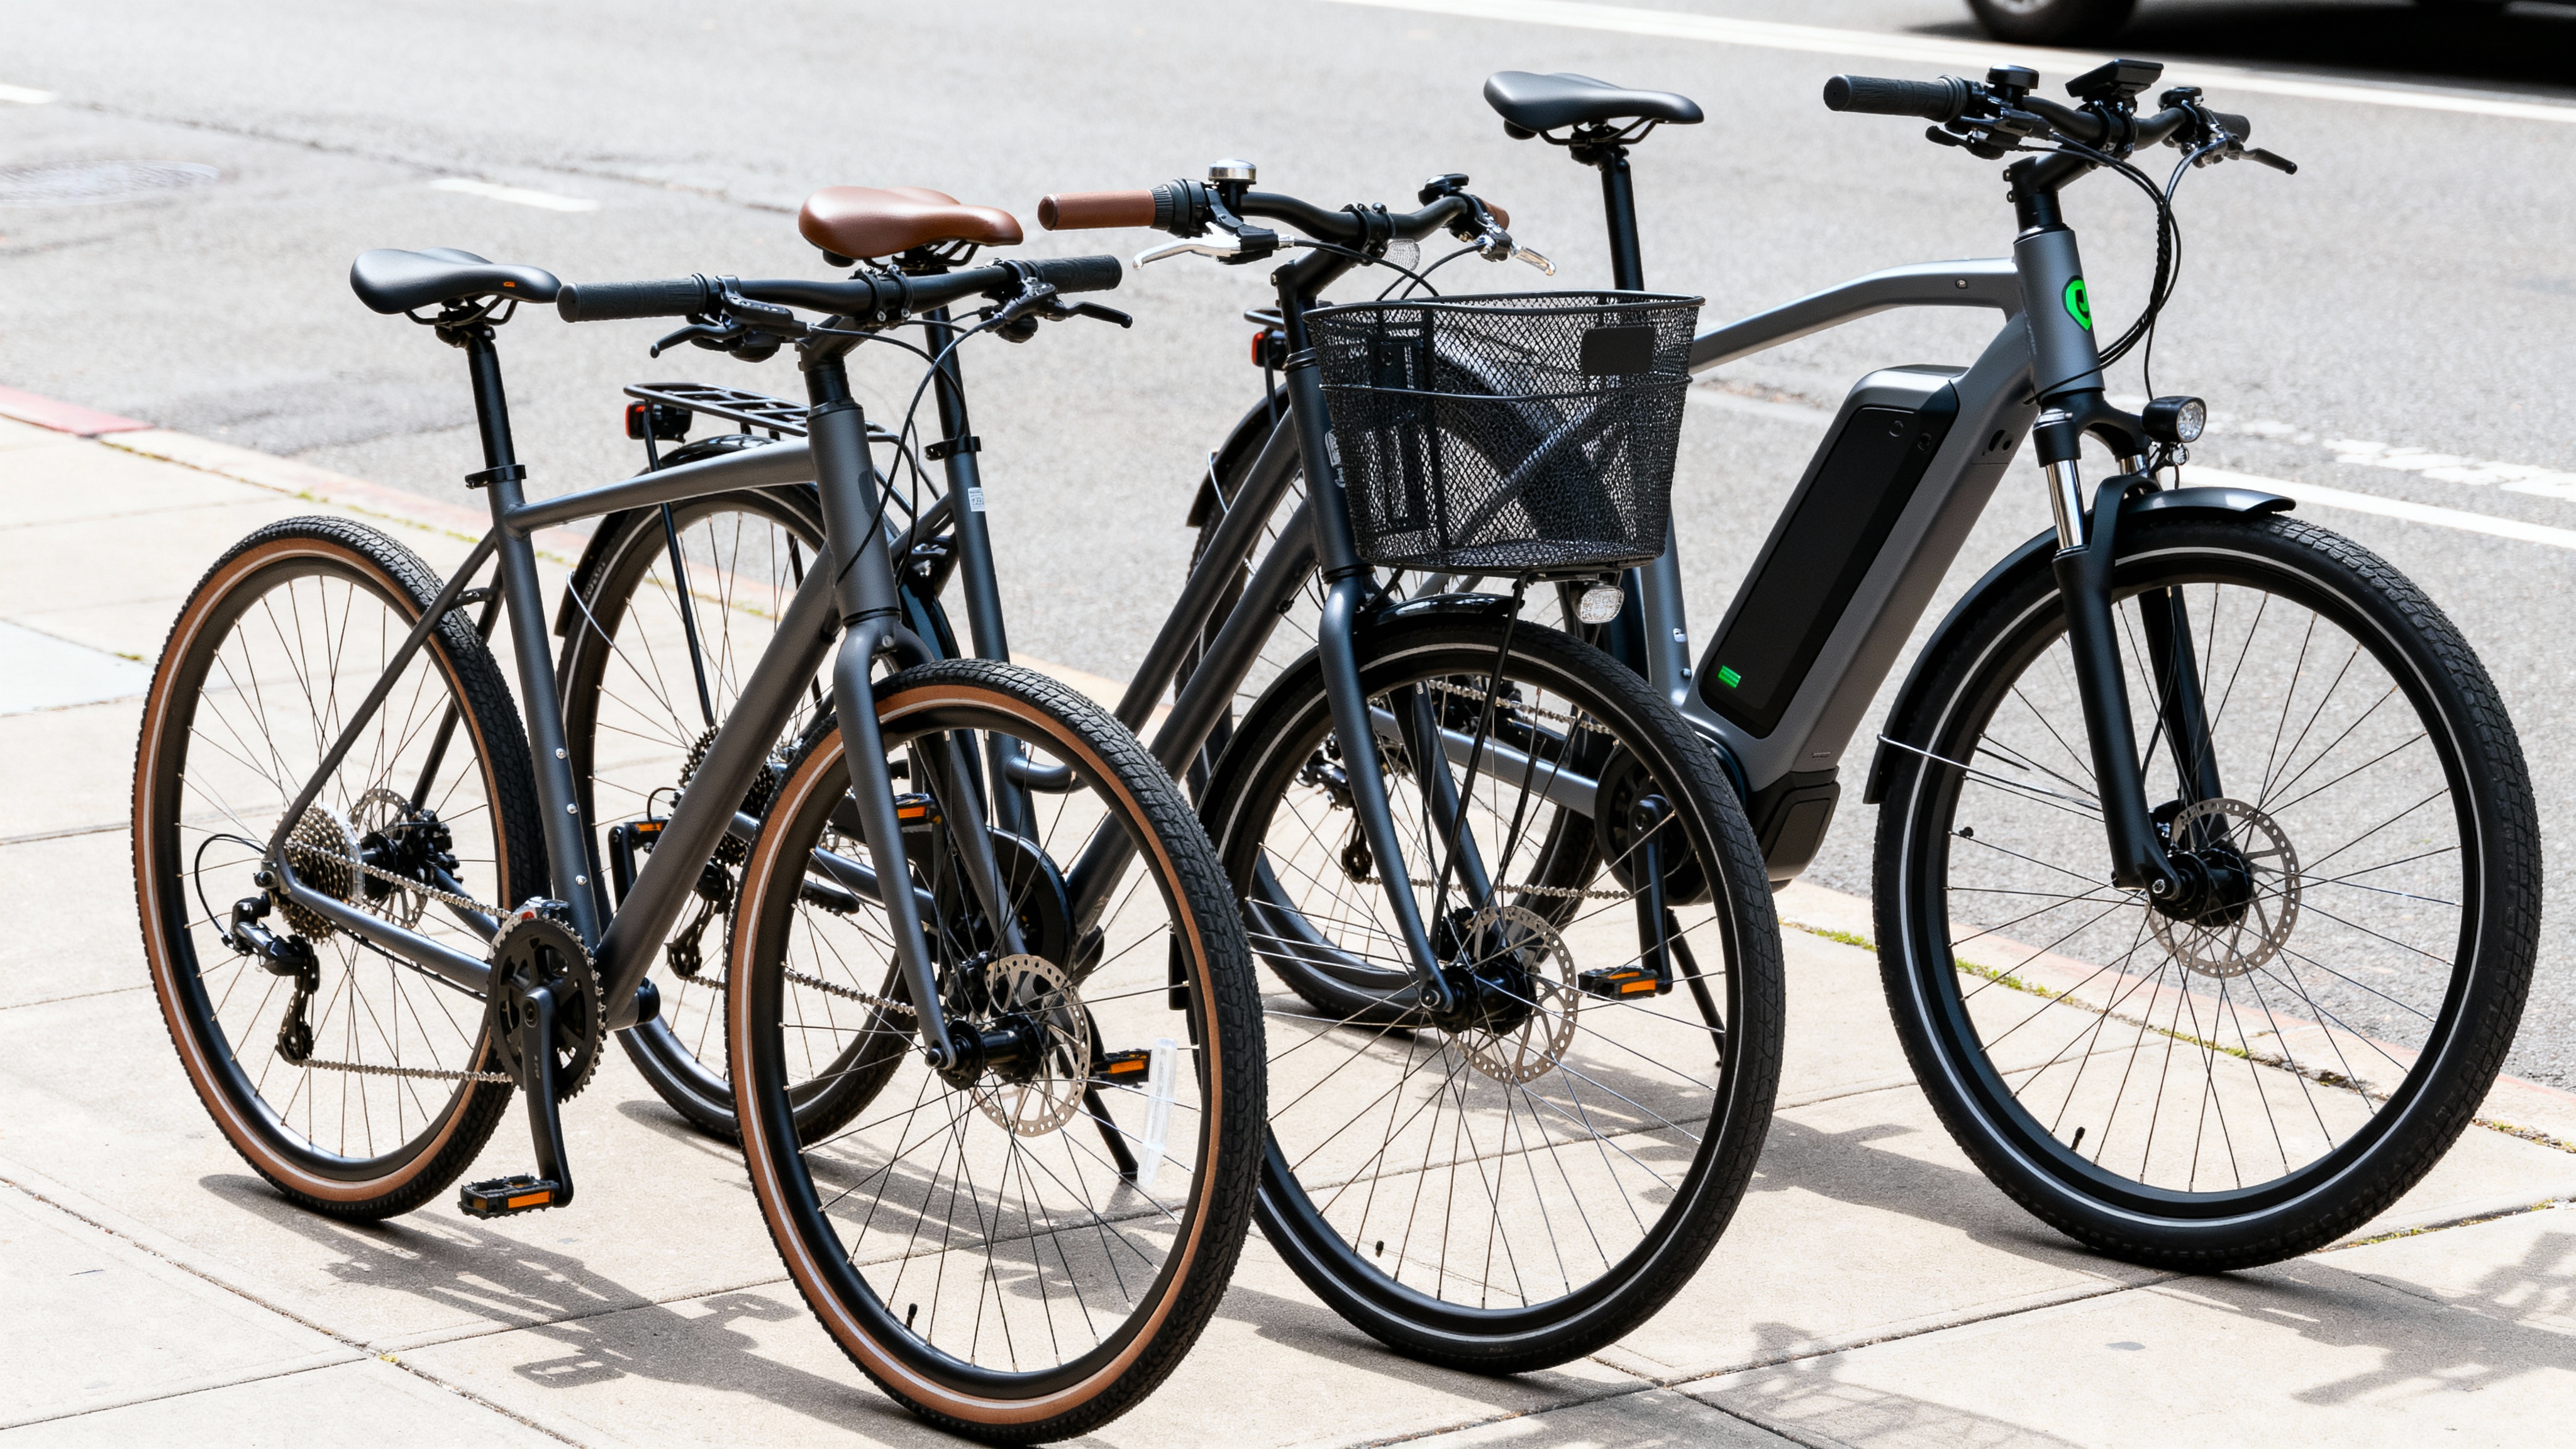
Hybrid Bikes: The most popular commuter choice, hybrids blend road bike efficiency with mountain bike comfort and versatility. They typically feature upright geometry reducing neck and back strain, medium-width tires (28-40mm) balancing speed with bump absorption, and multiple mounting points for racks and fenders.
City Bikes: Purpose-built for urban commuting, city bikes prioritize comfort and convenience over speed. Expect fully upright riding positions, integrated lights and fenders, internal hub gears requiring minimal maintenance, and chain guards protecting work clothes from grease.
Gravel Bikes: For longer commutes or mixed-surface routes, gravel bikes offer versatility with drop bars providing multiple hand positions, clearance for wider tires (up to 45mm+), and robust frames handling varied conditions.
Electric Bikes: E-bikes have transformed commuting by eliminating “arriving sweaty” concerns. They enable longer commutes without exhaustion, help maintain consistent timing regardless of headwinds or hills, and reduce physical barriers for riders of varying fitness levels.
Frame Material Matters
For daily commuting exposed to weather and road salt, material choice impacts long-term satisfaction:
Aluminum: The default choice offering excellent strength-to-cost ratio, corrosion resistance, and adequate ride quality. Most commuter bikes under $1,500 use aluminum frames.
Steel: Traditional and beloved by many commuters for its durability, repairability, and natural vibration damping. Steel frames can last decades with proper care but weigh more than aluminum equivalents.
Carbon: Rarely justified for commuting unless you’re covering serious distances. The weight savings don’t offset the higher cost and vulnerability to impact damage from locks, crashes, or bike rack contact.
Essential Components for Reliable Daily Riding
Now that you understand bike selection, let’s examine the components that separate reliable commuters from fair-weather bikes.
Drivetrain: Simplicity Wins
For commuting, simpler drivetrains mean less maintenance and fewer roadside issues. Single-speed setups work perfectly for flat urban environments, offering minimal maintenance, lighter weight, and lower costs.
However, most commuters benefit from gearing. Internal hub gears (3-8 speeds) provide weather-sealed shifting requiring virtually no maintenance, consistent performance in wet conditions, and ability to shift while stationary—perfect for stop-and-go city riding.
External derailleurs offer wider gear ranges and are easier to repair but require more frequent adjustment and don’t handle bad weather as gracefully. For hilly commutes, a 1×7 or 1×8 setup provides adequate range with reduced complexity compared to 2x or 3x systems.
Braking Systems: Don’t Compromise Here
Quality brakes are non-negotiable for commuter safety. Hydraulic disc brakes deliver reliable stopping power in all weather conditions, require less hand force reducing fatigue, and need less frequent adjustment than mechanical systems.
For budget builds, mechanical disc brakes still dramatically outperform rim brakes in wet conditions. Rim brakes only make sense on fair-weather commuters in dry climates—and even then, disc brakes provide better value over the bike’s lifetime.
Tire Selection: Your Comfort and Reliability Foundation
Tires dramatically impact commuting experience. Width matters more than you’d expect—wider tires (32-45mm) can run at lower pressures, absorbing road imperfections for a smoother ride and reducing fatigue on rough city streets.
Puncture protection is equally critical. Look for tires specifically advertising reinforced puncture protection layers. Brands like Schwalbe Marathon, Continental Contact, and Panaracer Gravel King offer commuter-specific models balancing durability with reasonable weight.
Tire pressure requires more attention than most riders give it. Running tires at maximum pressure creates a harsh ride and doesn’t improve speed on real-world rough roads. Experiment with lower pressures—you’ll likely find significantly improved comfort without noticeable speed loss.
Must-Have Accessories: The Core Four
Certain accessories transform a bike into a proper commuting machine. These aren’t optional extras—they’re essential tools enabling year-round, reliable transportation.
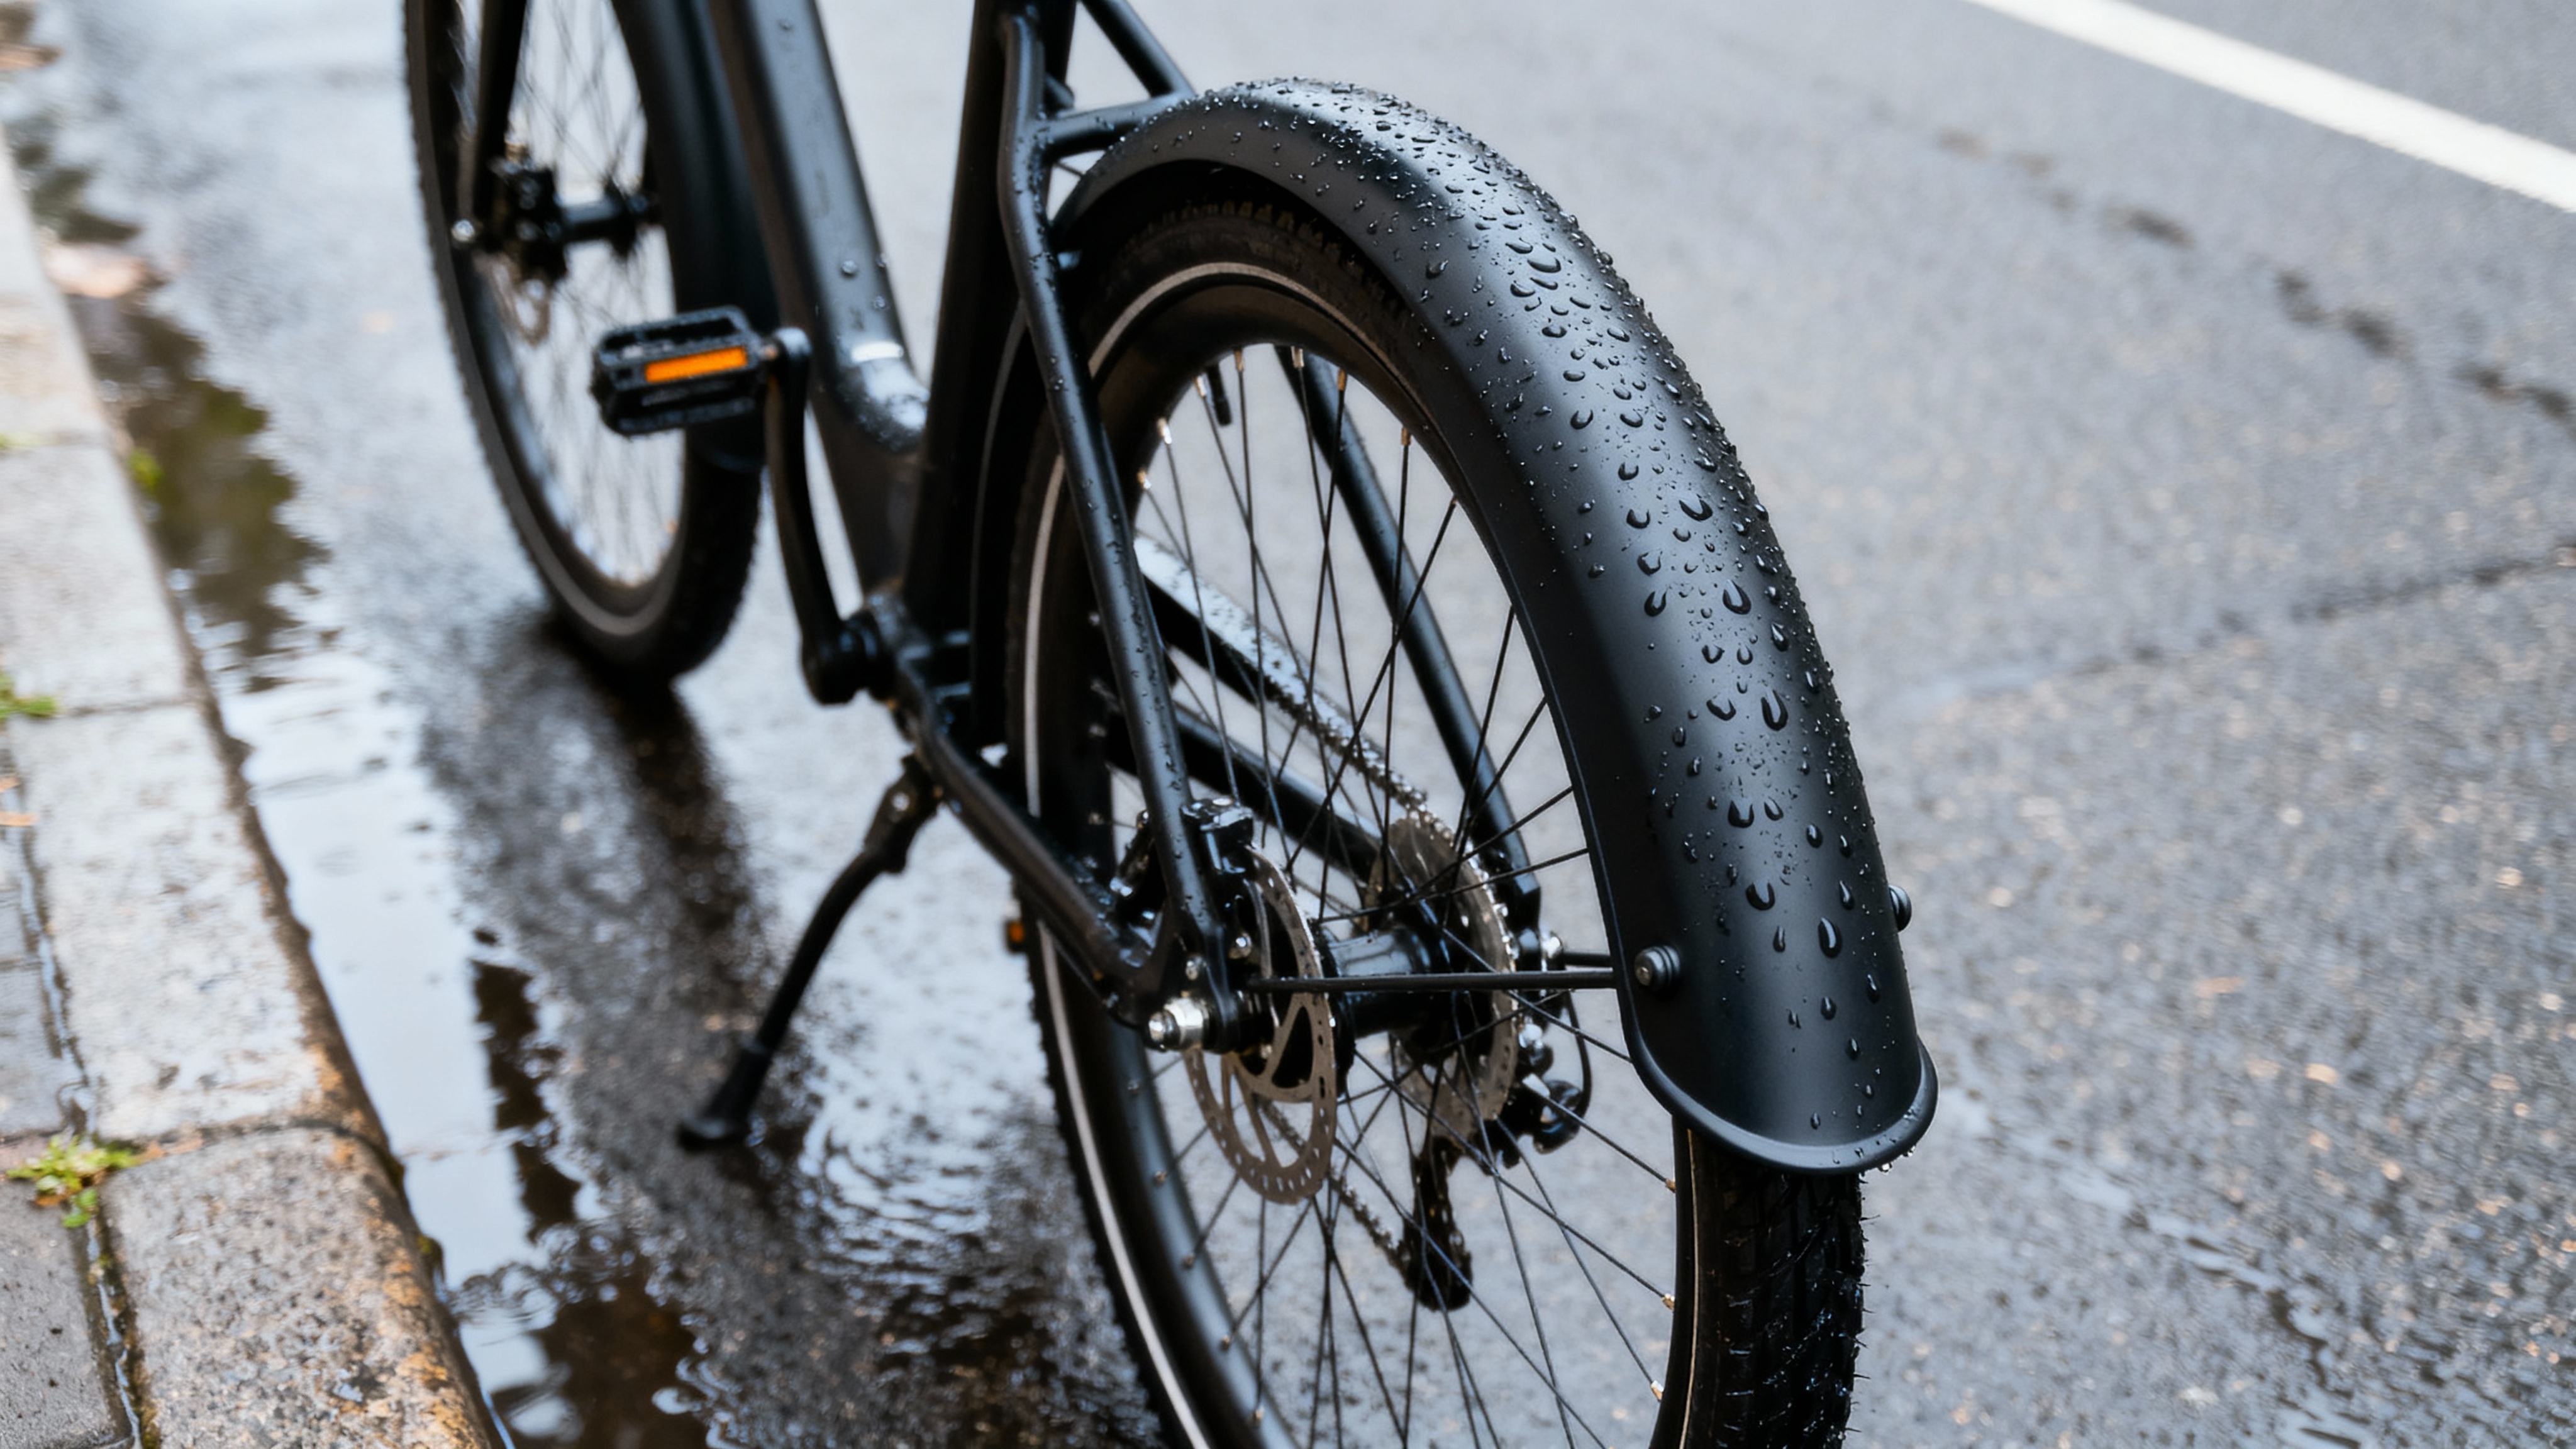
1. Fenders: Your First Defense Against Weather
As one experienced commuter puts it: “Life is simply too short to ride without mudguards.” Quality fenders keep you and your bike clean, dramatically reduce component wear from road grime, and eliminate the need to change clothes after wet rides.
Full-coverage fenders (front and rear) work best, extending low enough to catch spray kicked up by wheels. Plastic models like SKS or Portland Design Works offer good performance at reasonable prices. Metal fenders (Velo Orange, Honjo) cost more but last indefinitely and look fantastic.
Proper installation matters. Poorly fitted fenders rattle, vibrate, and may contact tires. Take time to adjust them correctly or have a shop do it—it’s worth the effort.
2. Lighting Systems: Be Seen and Be Safe
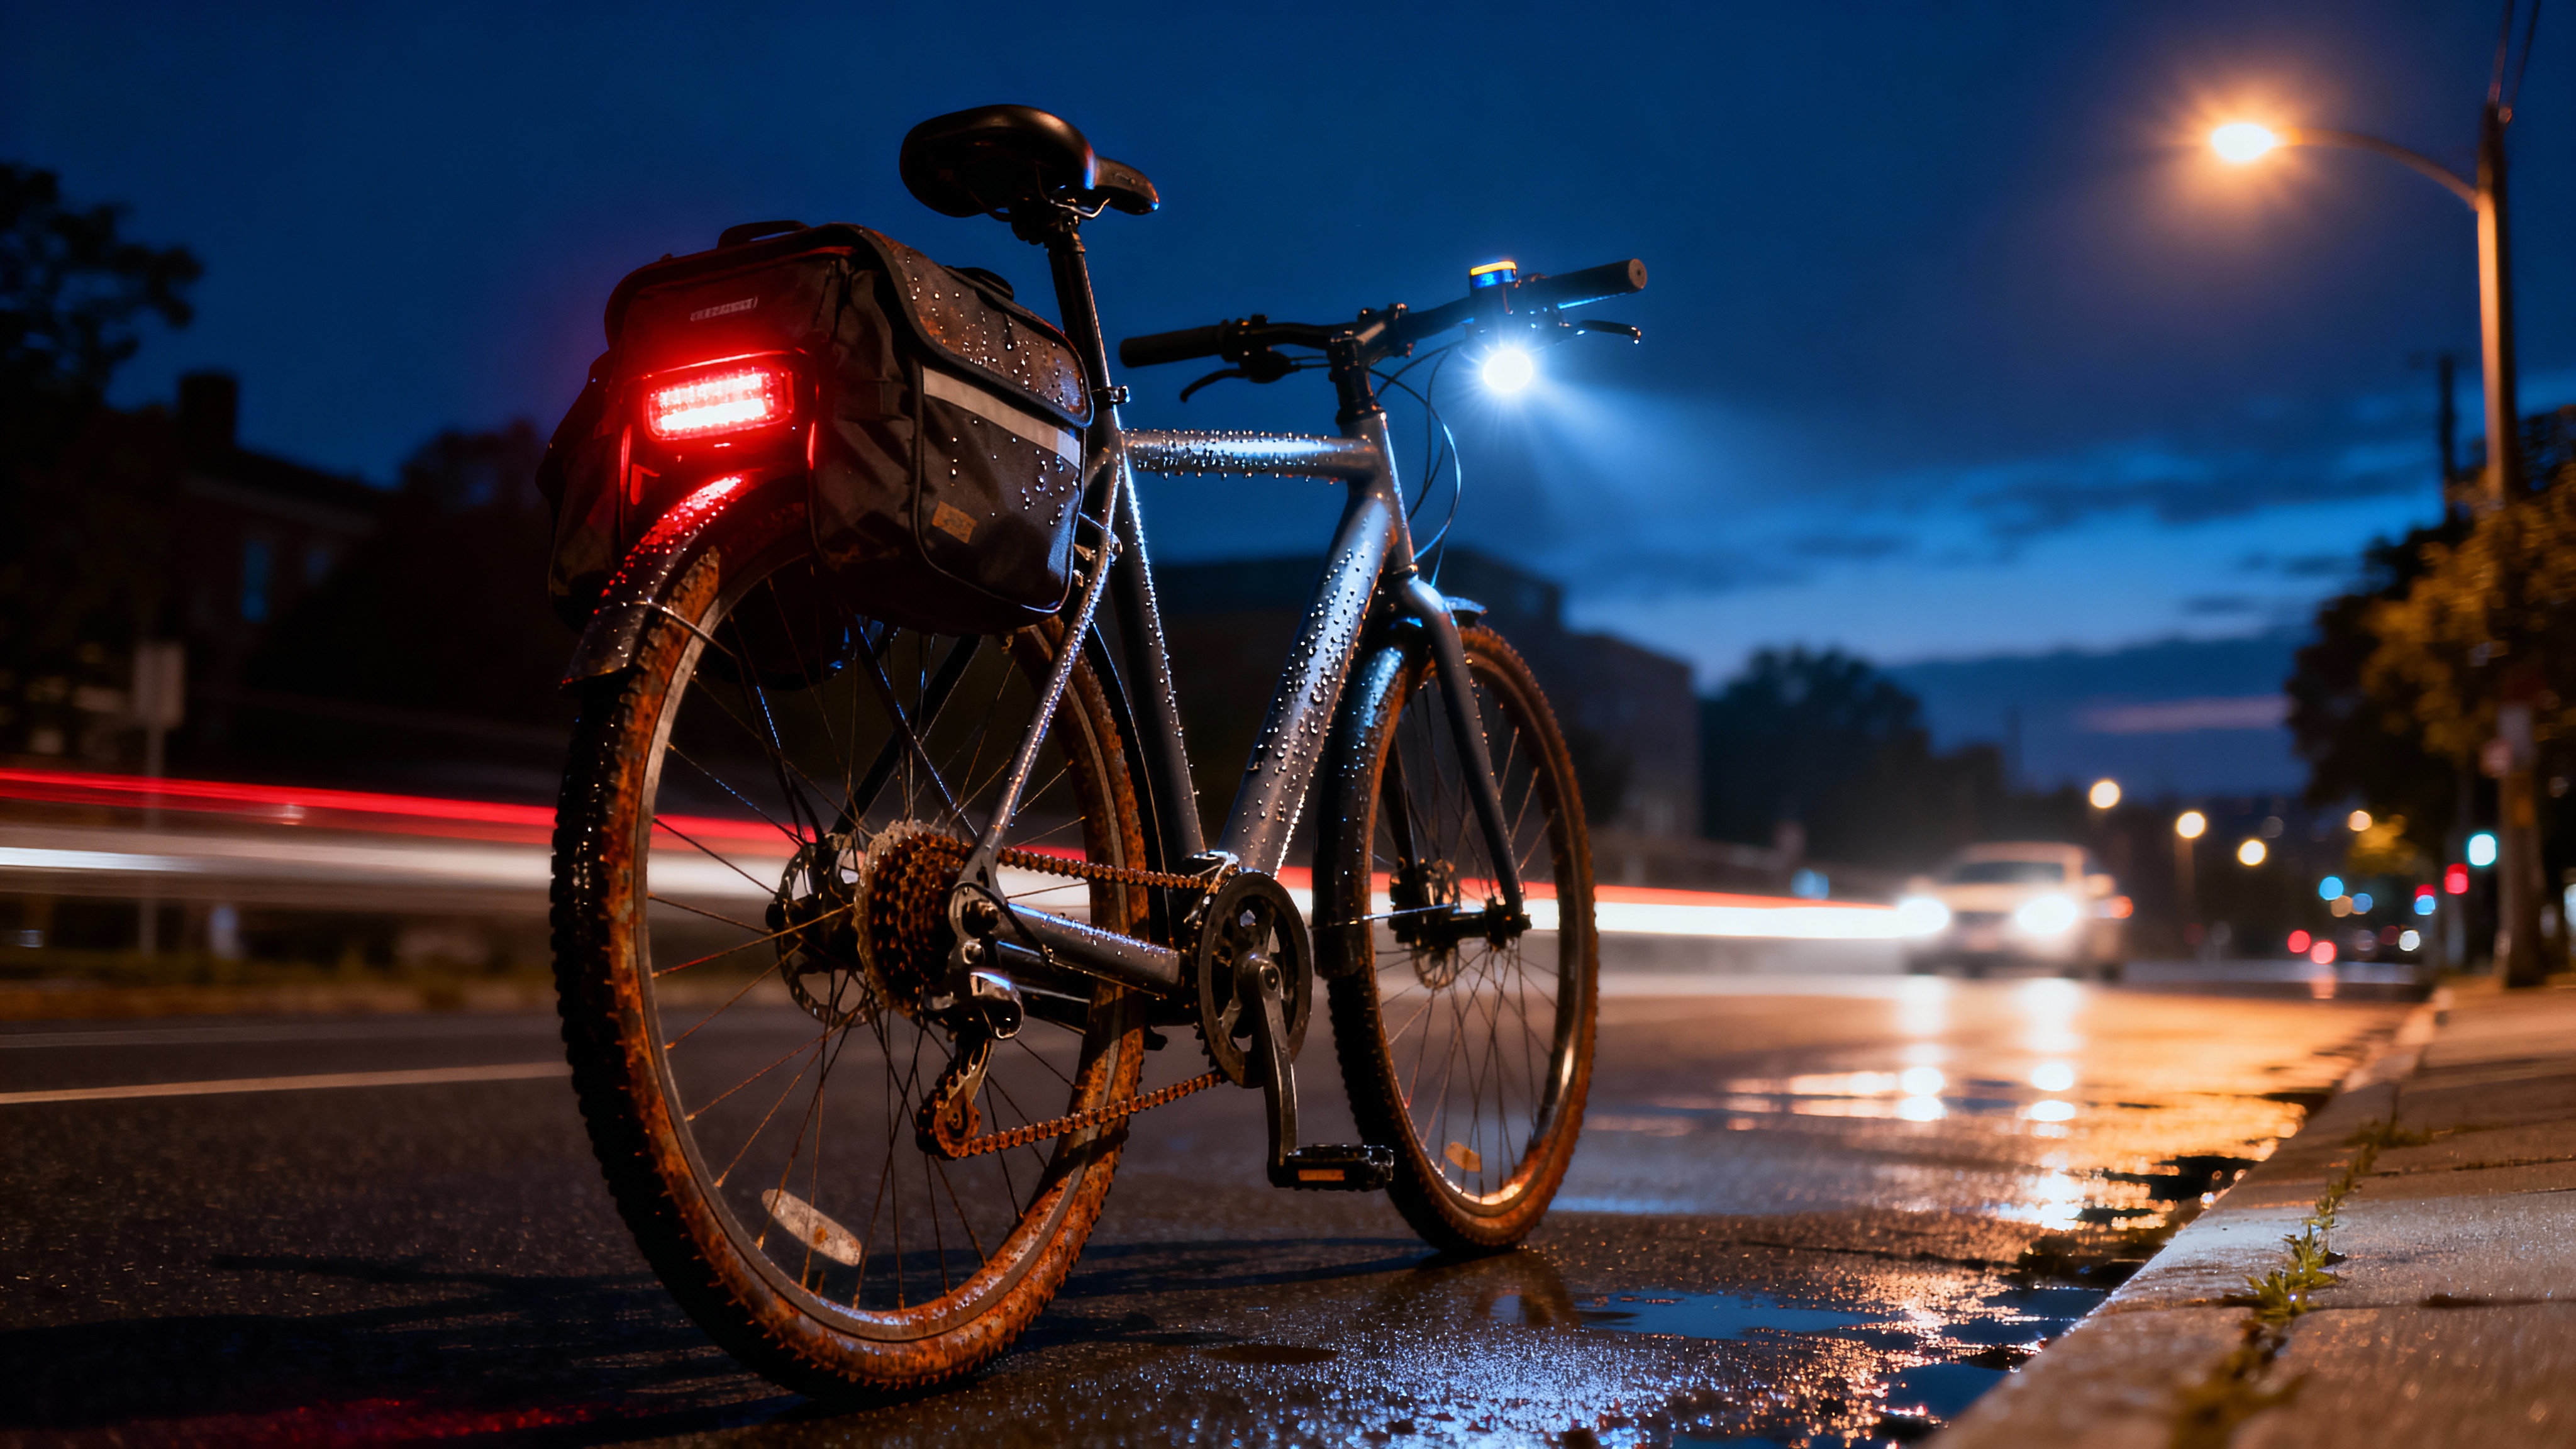
Visibility is critical, especially during darker months. Front lights need sufficient brightness (at least 400 lumens) to see road hazards, with focused beam patterns illuminating your path without blinding oncoming traffic.
Rear lights should use attention-grabbing flash patterns. Studies show motion attracts driver attention more effectively than steady lights. Some modern rear lights include automatic brake light functions sensing deceleration.
Integrated lighting systems powered by the bike’s electrical system or dynamo hubs eliminate battery charging hassles. For traditional lights, USB-rechargeable models provide convenience without disposable battery waste.
Don’t stop at bike-mounted lights. Reflective elements on your body—jacket panels, ankle bands, helmet strips—increase driver awareness dramatically. Motion of reflective elements on pedaling legs particularly catches driver attention.
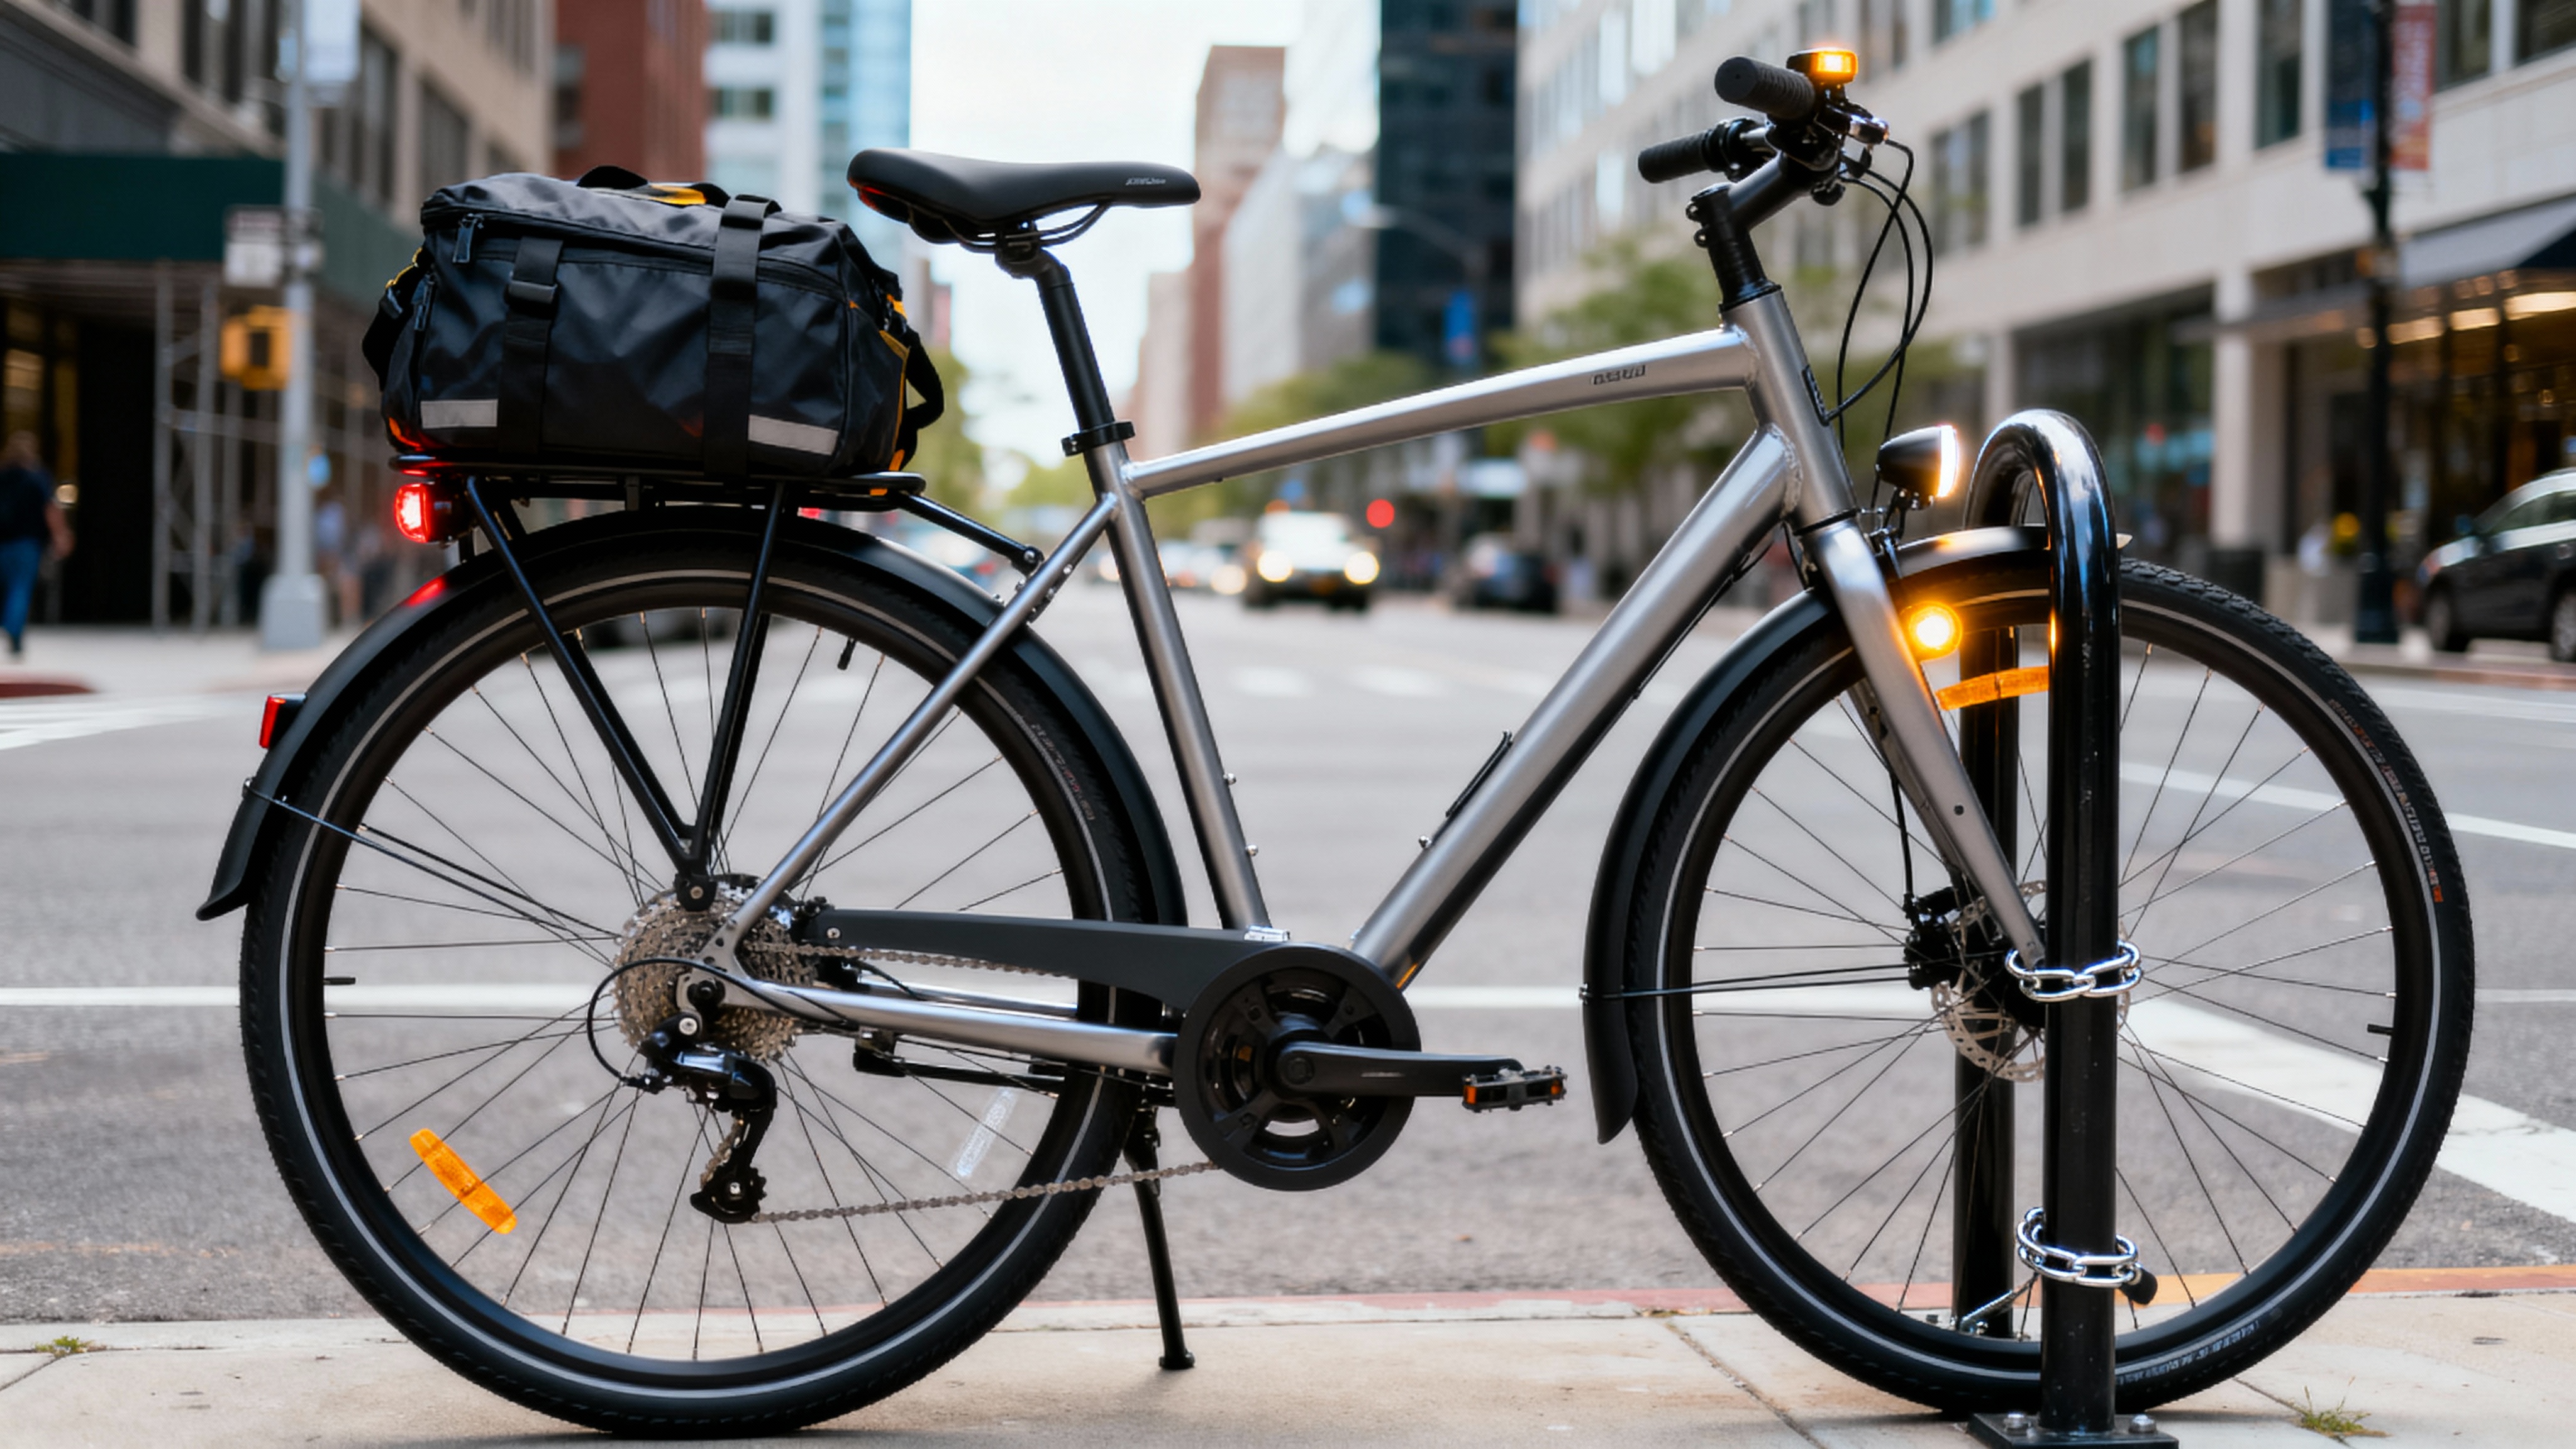
3. Cargo Solutions: Leave the Backpack Behind
Carrying work essentials in a backpack creates several problems: back sweat, reduced situational awareness when looking over your shoulder, and unnecessary shoulder strain. Bike-mounted cargo solutions are vastly superior.
Rear Racks and Panniers: The most versatile cargo solution. Weatherproof panniers with laptop compartments protect electronics while quick-release systems let you transform them into professional-looking bags for the office.
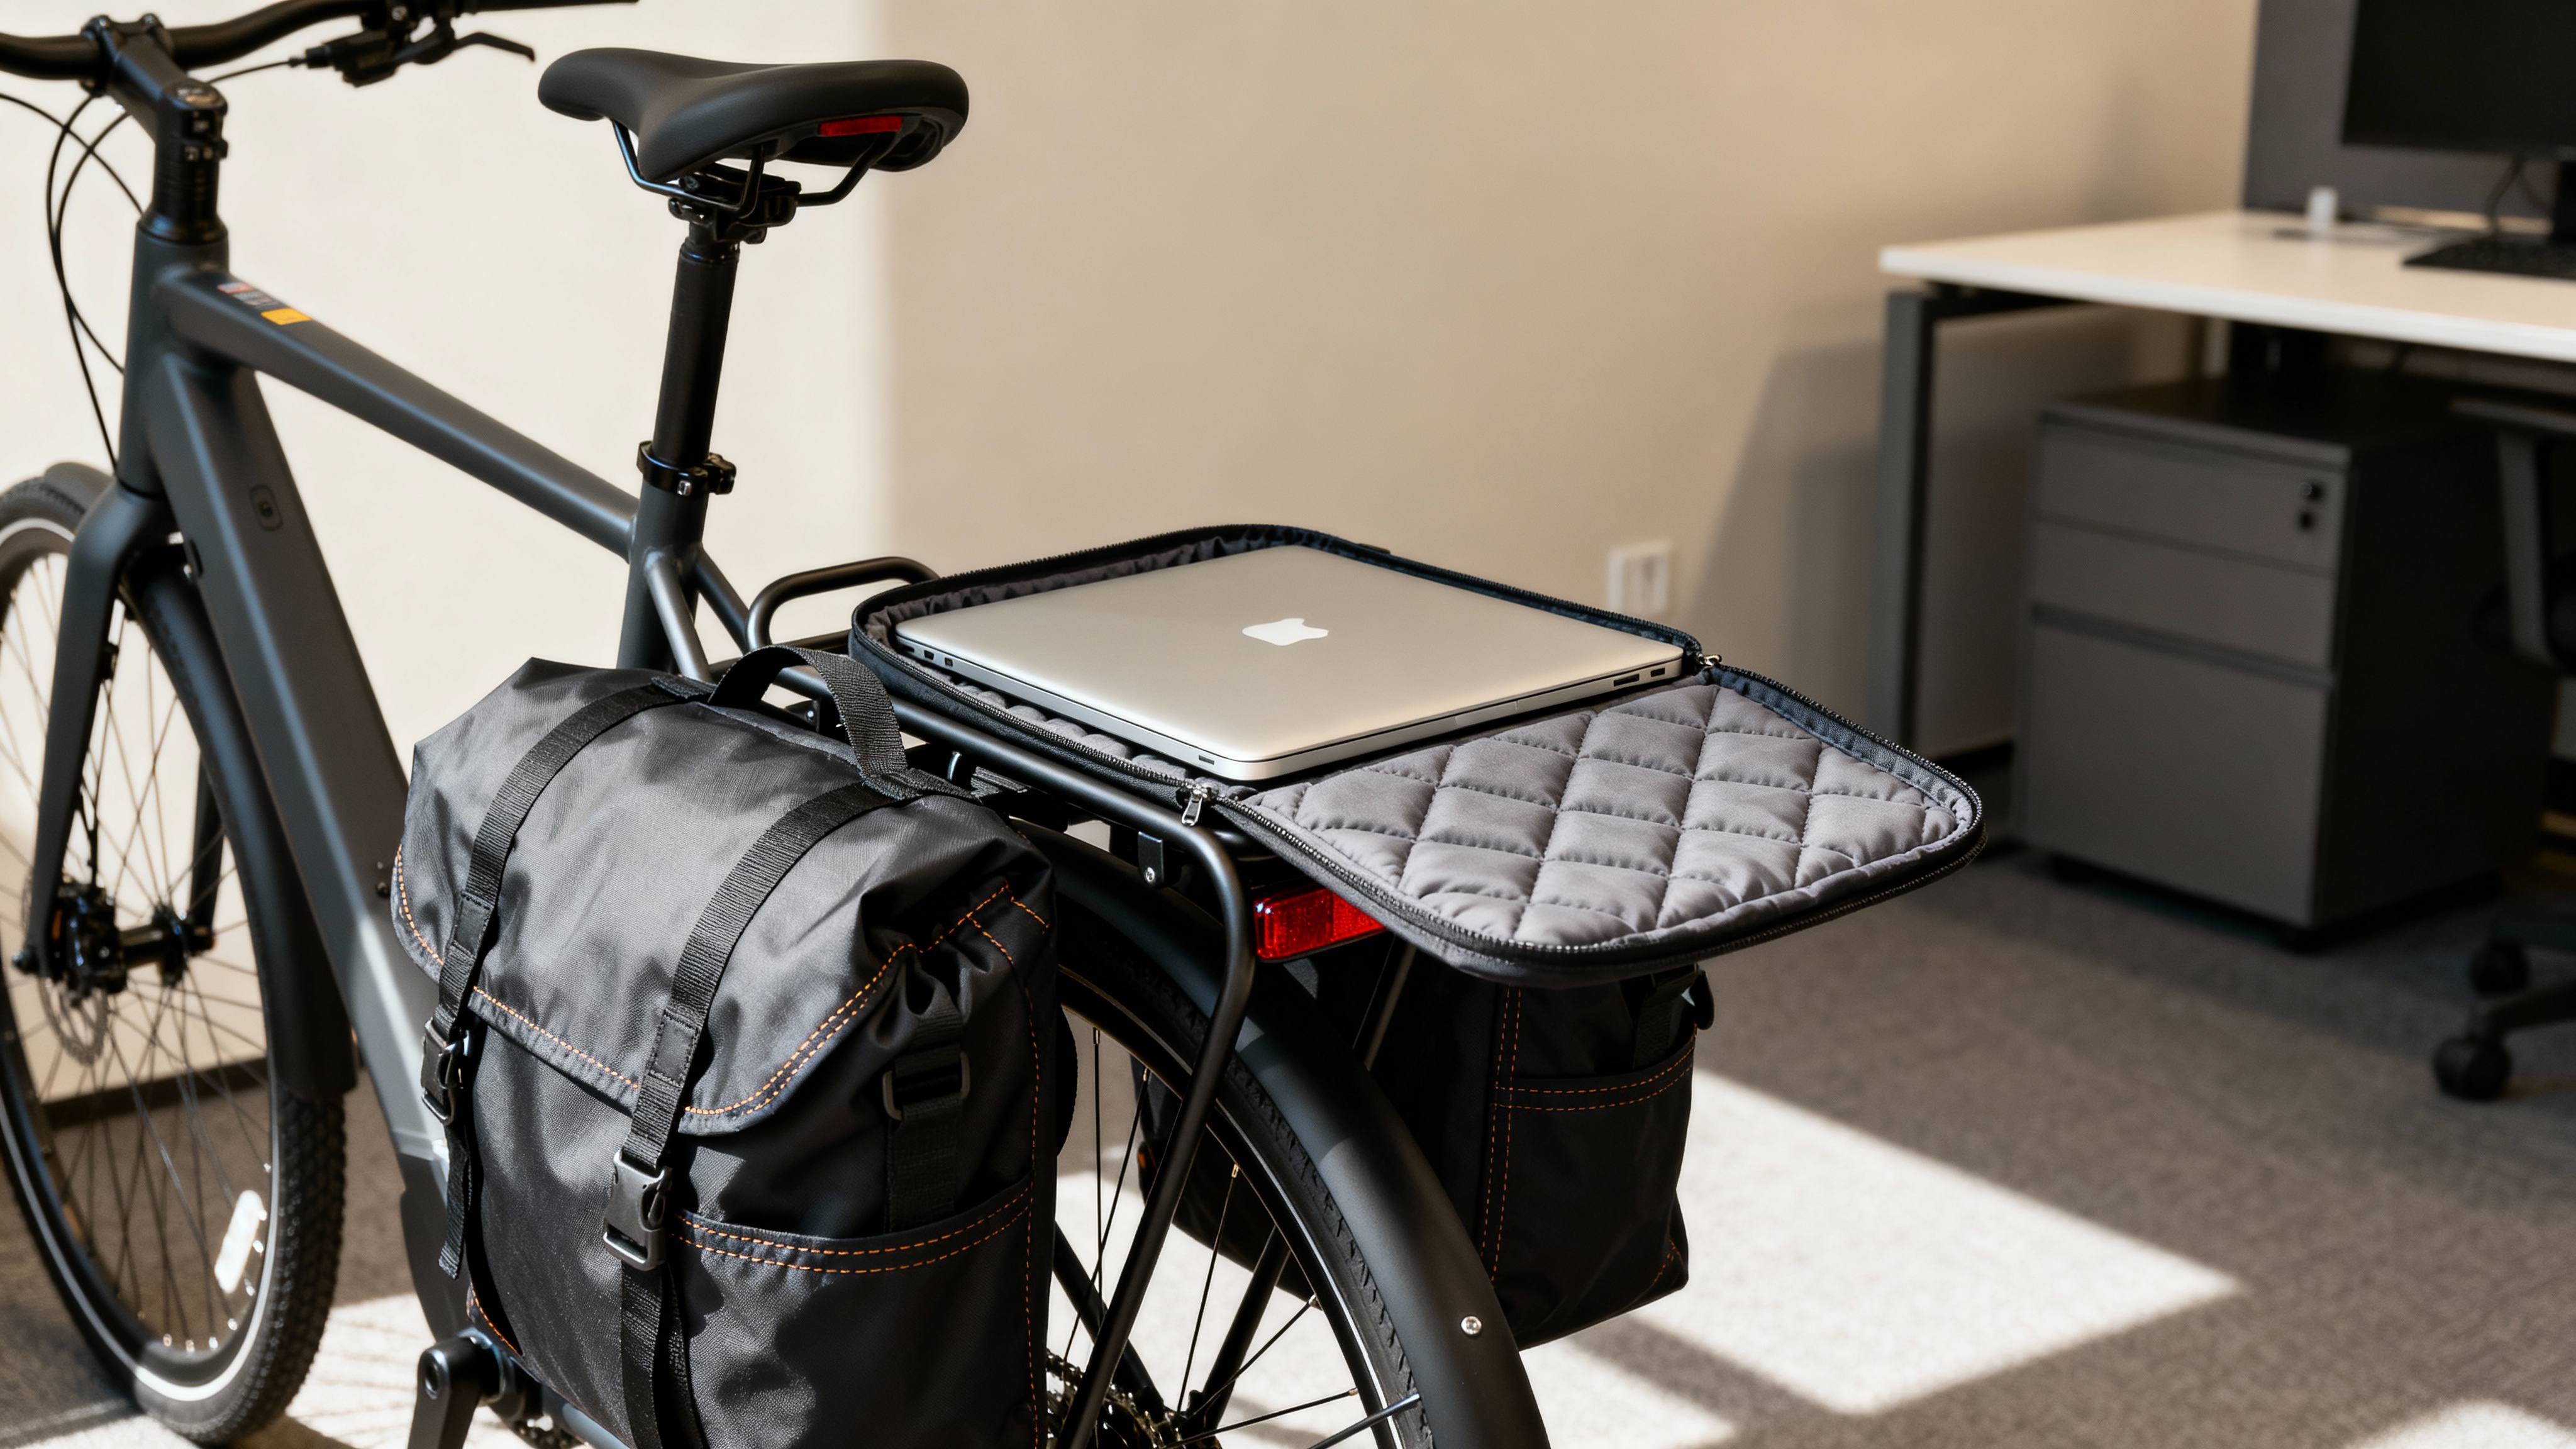
Look for panniers with:
- Waterproof or water-resistant construction (roll-top closures work well)
- Padded laptop sleeves fitting your device size
- Reflective elements for added visibility
- Attachment systems securing bags firmly without rattling
Front Racks and Baskets: Lighter loads work perfectly in front baskets. The configuration provides easier access to frequently needed items, better weight distribution for bike handling, and a classic aesthetic many riders prefer.
Frame Bags: Mounting bags directly to the frame keeps weight centered and low, improving handling compared to rear racks. Frame bags work well for tools, spare layers, and snacks while keeping panniers available for larger items.
4. Secure Locking System: Protect Your Investment
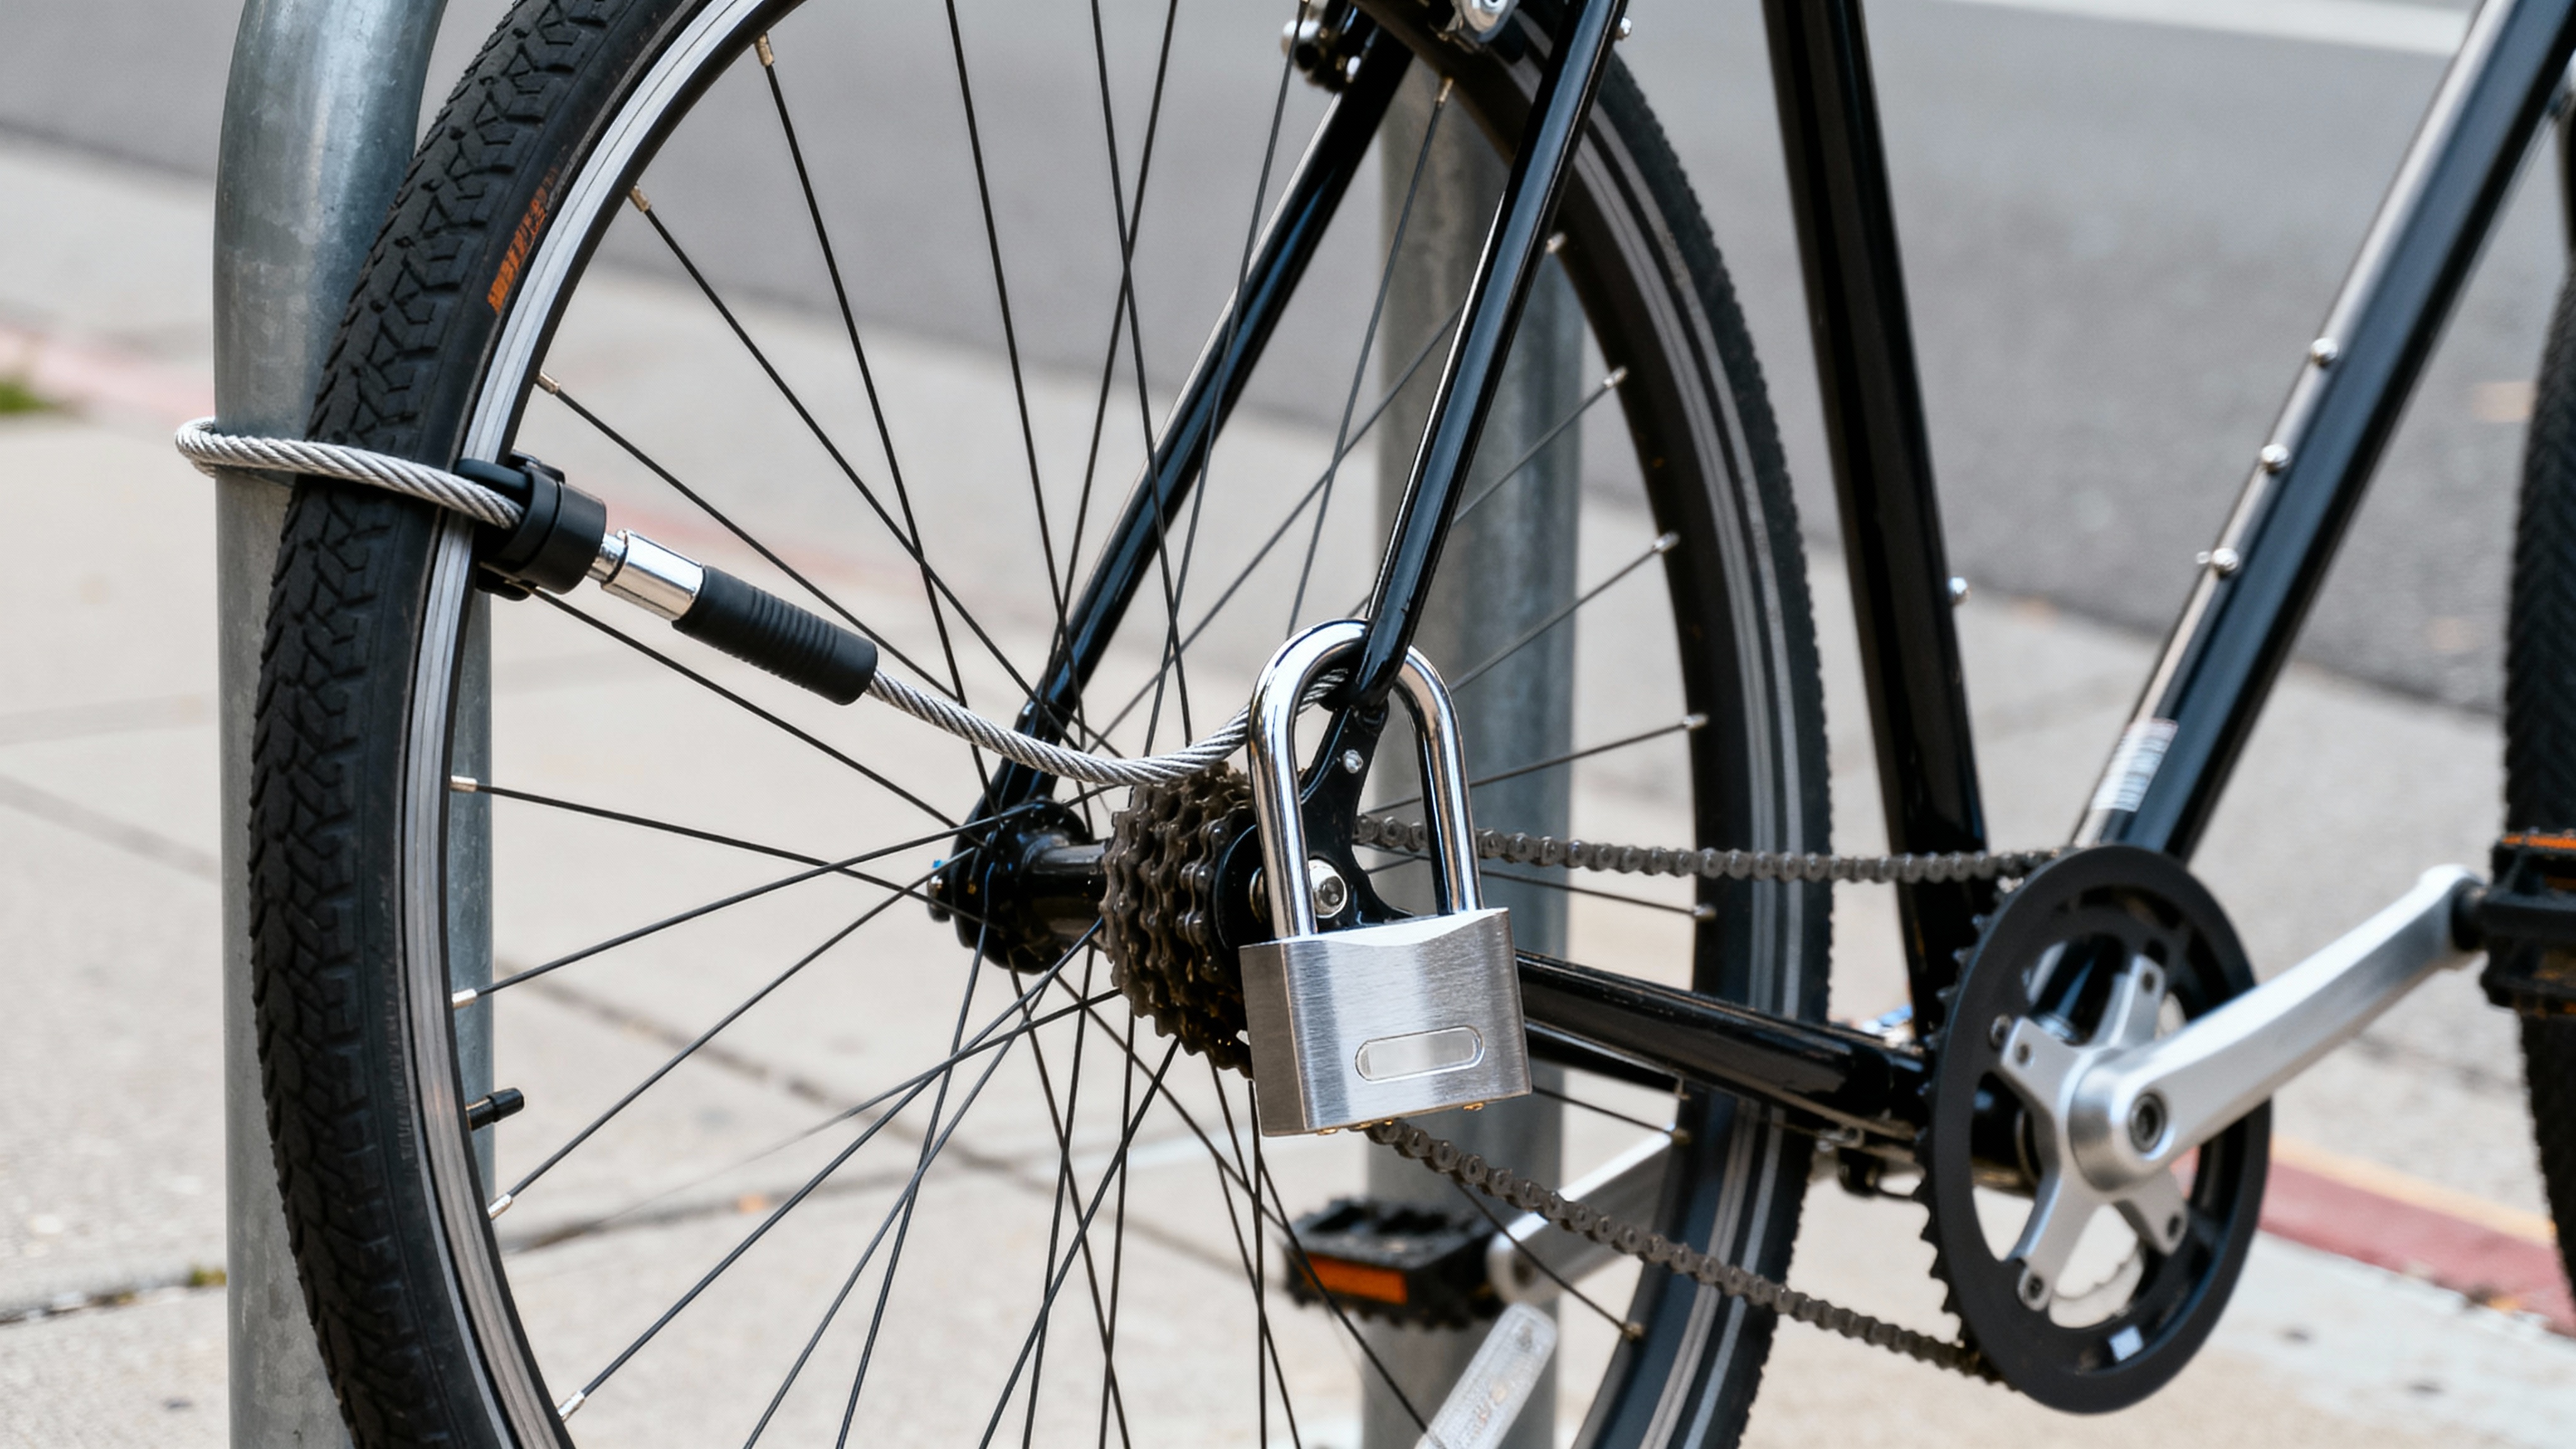
A quality lock system is expensive but cheaper than replacing a stolen bike. Plan to spend 10% of your bike’s value on locks.
The gold standard: a U-lock for the frame and rear wheel combined with a cable for the front wheel and any quick-release components. Position the U-lock to minimize space inside the shackle (less space means fewer angles for lever attacks) and lock to fixed, well-secured objects.
For high-theft areas, consider two locks of different types (U-lock plus chain), making theft more time-consuming and requiring thieves to carry multiple tool types. Lock both wheels and frame to immovable objects in well-lit, high-traffic locations.
Optimizing Comfort for Long-Term Commuting
Comfort directly impacts whether you’ll stick with bike commuting long-term. Small discomforts magnified by daily repetition become deal-breakers.
Saddle Selection: Worth the Investment
The stock saddle rarely works perfectly for everyone. Proper saddle selection starts with understanding sit bone width—many bike shops offer measurement tools. Choose saddles matching your anatomy and riding position.
Commuter saddles typically feature more padding than performance road saddles, cutouts or channels reducing pressure on sensitive areas, and weather-resistant covers withstanding exposure.
Don’t judge a saddle on first ride—allow 2-3 weeks for break-in and your body to adapt. If discomfort persists, try different models. The right saddle feels unnoticeable; the wrong one makes every commute miserable.
Handlebar and Grip Options
Hand position significantly affects comfort, especially on longer commutes. Flat bars work well for shorter rides and provide excellent control in traffic. For commutes over 30 minutes, consider:
Swept-back bars: Reduce wrist strain with more natural hand position Jones H-bars or alt bars: Offer multiple hand positions on flat bar bikes Ergonomic grips: Support palms properly, reducing numbness and discomfort
Cork or foam grips typically feel better than hard rubber, absorbing vibration effectively. Bar tape on drop bars should be thick enough to cushion but not so thick you can’t feel controls properly.
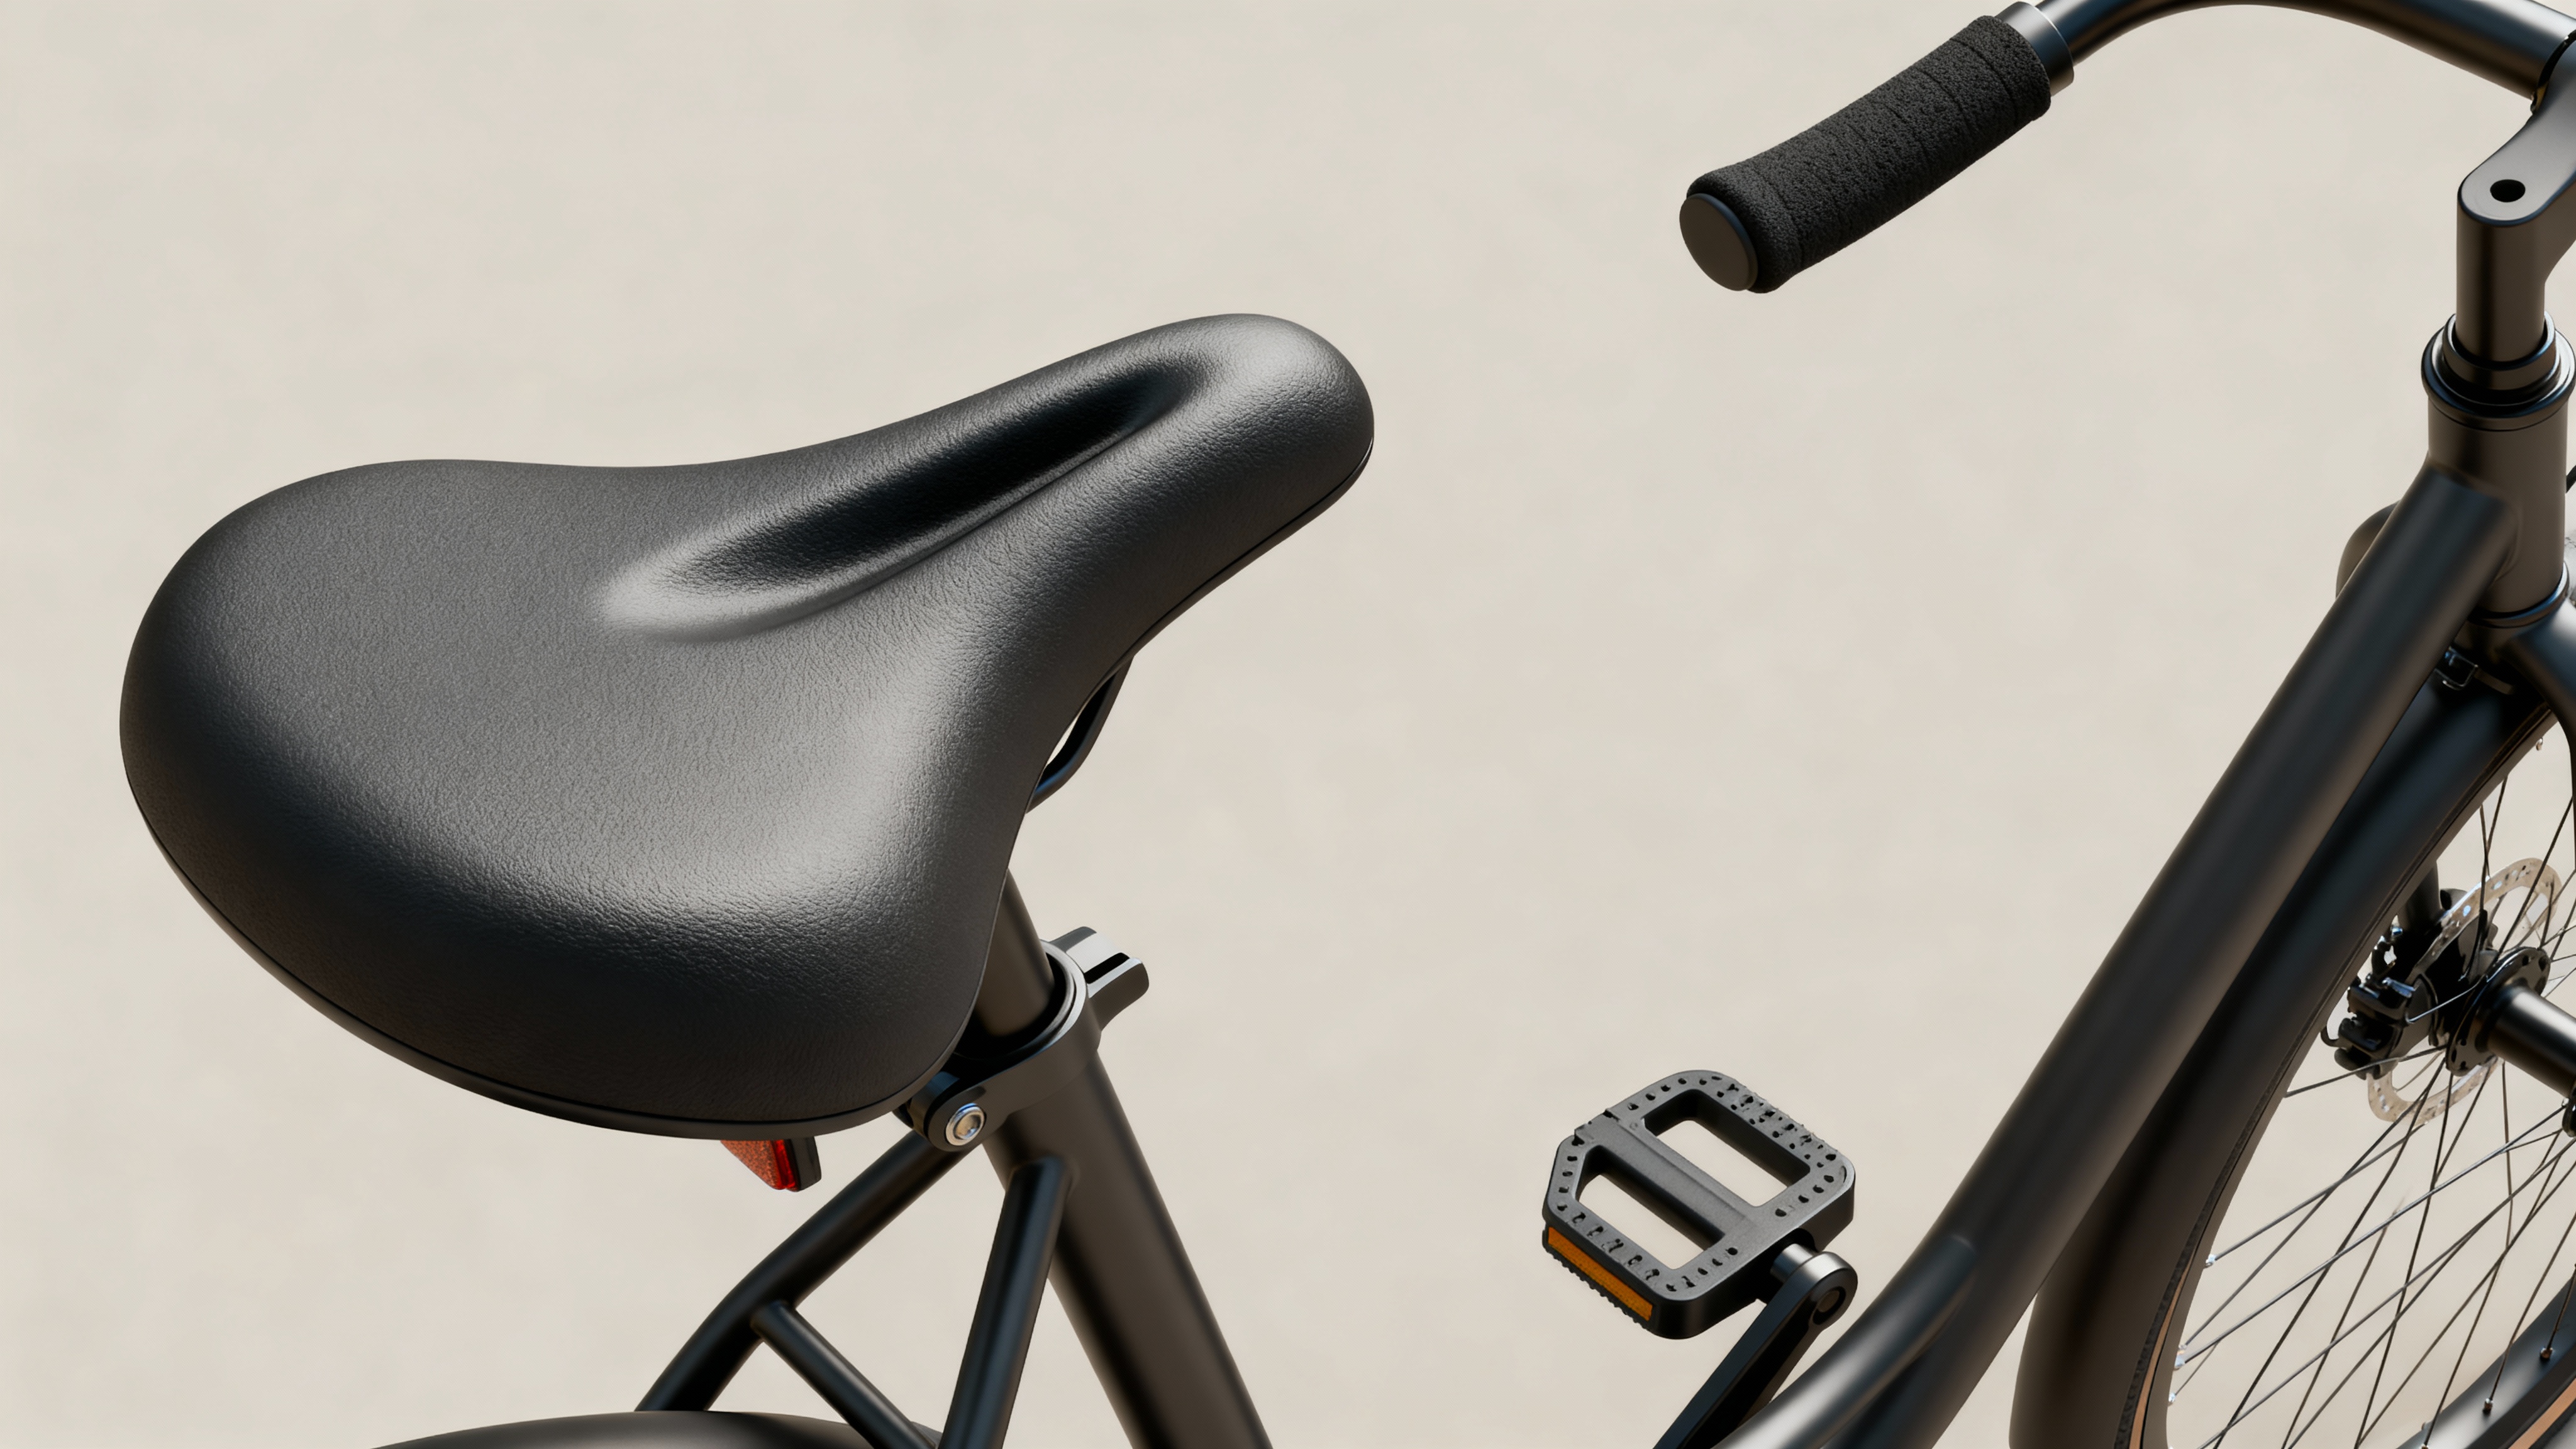
Contact Point Upgrades
Pedals influence comfort more than most realize. Platform pedals with grippy surfaces work well for commuting in regular shoes. If using clipless pedals, consider platform pedals for winter when you need to put feet down frequently on slippery surfaces.
Suspension seatposts can dramatically improve comfort on rough urban streets without the maintenance and weight of full suspension. They’re particularly valuable on older bikes with harsh ride quality.
All-Weather Commuting: Setup for Year-Round Riding
True commuter bike setups handle whatever weather arrives. Research shows that riders prepared for all conditions maintain commuting habits year-round, multiplying health and financial benefits.
Winter-Proofing Your Setup
Cold weather commuting requires specific preparations. Beyond personal clothing (covered in countless guides), your bike needs attention:
Tire Considerations: Wider tires provide better traction. Some commuters invest in studded tires for icy conditions, though they’re only necessary for truly hazardous winter climates. Slightly lowering tire pressure increases contact patch size, improving traction.
Lubrication: Switch to winter-specific chain lubricants designed to repel water and resist low temperatures. Clean and re-lube your chain more frequently—salt and grime accelerate wear dramatically.
Lighting: Days are shorter, making lights even more critical. Consider additional battery capacity or bringing spare batteries as cold temperatures reduce battery performance.
Bike Maintenance in Harsh Conditions
Winter and wet weather demand more frequent maintenance. Clean your bike regularly—at minimum, wipe down the frame and drivetrain after muddy or salty rides. A thorough monthly wash prevents long-term corrosion.
Pay special attention to:
- Chain condition (clean and lube more frequently)
- Brake pad wear (wet weather accelerates deterioration)
- Cable condition (rust and fraying happen faster in winter)
- Bolt tightness (temperature cycling can loosen components)
Store your bike indoors when possible. If you must store outside, invest in a quality bike cover protecting from precipitation and UV exposure.
Building Your Commuter Toolkit
Even reliable commuters occasionally need repairs. Carrying essential tools prevents minor issues from derailing your commute.
Essential On-Bike Tools
Keep these permanently on your bike in a saddle bag or frame bag:
- Multi-tool with hex keys, screwdrivers, and chain breaker
- Spare tube (or two for longer commutes)
- Tire levers
- Portable pump or CO2 inflator
- Patch kit (backup for used spare tube)
- Small zip ties and electrical tape (field-repair miracles)
At-Home Maintenance Kit
For home maintenance, add:
- Chain cleaning tool and degreaser
- Quality chain lubricant
- Bike-specific brushes
- Torque wrench (preventing over-tightening)
- Spare brake pads
- Extra chain quick-link
- Spoke wrench
Learning basic repairs—fixing flats, adjusting brakes, replacing chains—saves money and prevents being stranded. Numerous online video tutorials make learning straightforward.
Advanced Commuter Upgrades
Once you’ve mastered the basics, these upgrades can further optimize your commuting experience.
Dynamo Lighting Systems
Hub dynamos generate electricity as you ride, powering lights without batteries to charge. Modern systems produce negligible drag and provide reliable lighting. While expensive upfront ($200-500 for hub, lights, and installation), they eliminate battery management forever.
Electronic Shifting
For premium commuter builds, electronic shifting provides effortless, precise gear changes in any weather. Systems like Shimano Di2 or SRAM eTap AXS never need cable adjustment and shift flawlessly in rain, snow, or mud. The high cost limits appeal to serious commuters covering long distances daily.
Smart Locks and GPS Tracking
Integrated smart locks like Linka combine security with convenience, eliminating keys and offering smartphone control. GPS trackers won’t prevent theft but improve recovery chances—subscription services like Tile or Apple AirTag integration provide location tracking.
Bike Computers and Navigation
Modern bike computers offer turn-by-turn navigation, fitness tracking, and integration with smartphone apps. For commuters exploring new routes or tracking mileage for tax purposes, computers like Wahoo ELEMNT or Garmin Edge models provide valuable functionality.
Alternatively, smartphone mounts work well for occasional navigation. Choose sturdy, waterproof mounts protecting phones from weather and vibration.
Frequently Asked Questions
Q: How do I choose the right bike when I want to start commuting and bike to work?
The perfect bike for your commute depends on your specific route and needs. Most bike commuters who cycle to work find success with hybrids, city bikes, or even a road or gravel bike depending on topography. Before buying a new bike, take a test ride on different types to see what sort of bike feels comfortable. Consider whether you need a cargo bike or electric cargo option if you’re hauling groceries or a set of clothes to work. Brands like Surly, Tern, and Bontrager (Trek’s Roubaix line) offer excellent commuter-focused models. The best bike isn’t the most expensive—it’s the one you’ll actually ride every day.
Q: What drivetrain setup works best for daily bike commuters—derailleur or internally geared hub?
For reliable cycling, internally geared hubs (3-8 speed) excel because they’re sealed from weather, require minimal maintenance, and let you shift at any intersection or stoplight. Traditional derailleur systems with a cassette and shifter offer wider gear range but need more frequent adjustment. For ultimate low-maintenance commuting, consider a belt drive system like Gates Carbon Drive paired with an internally geared rear hub—no chain maintenance, no grease, and excellent longevity. The seat tube and bottom bracket area stay cleaner, and you won’t ruin clothes with chain grease when you get to work.
Q: Should I invest in an e-bike for commuting, and what about cargo capacity?
An e-bike transforms longer commutes by removing the “arriving sweaty” concern and enabling consistent timing regardless of headwinds or hills. They’re particularly valuable for bike commuters facing challenging topography or those who want to cycle to work without changing fitness levels. Electric cargo bikes from brands like Tern combine pedal assistance with serious hauling capacity—perfect for grocery runs or carrying work gear. Even non-electric cargo bikes work brilliantly if your route is relatively flat. The key is matching bike capacity to your actual cargo needs so you’re not wearing a backpack during every bike ride.
Q: What rain gear and clothing strategy should bike commuters use?
Smart bike commuters keep a set of clothes at work and wear weather-appropriate cycling gear during the ride. A quality waterproof jacket (Showers Pass makes excellent options) combined with rain pants protects you during downpours. Merino wool base layers work year-round—warm when wet, naturally odor-resistant, and comfortable across temperature ranges. Many cyclists prefer bringing a change of clothes rather than trying to keep work attire dry during the commute. This strategy lets you ride comfortably without worrying about arriving professional-looking, and you can enjoy the bike ride rather than stress about staying presentable.
Q: How do I stay safe sharing the road as a cyclist, especially at busy intersections?
Visibility is your primary defense. Bright lights, reflective gear, and riding predictably help drivers and pedestrians anticipate your movements. At intersections, make eye contact with drivers before proceeding and position yourself where you’re visible—don’t hide in blind spots. Many experienced bike commuters choose routes with protected bike lanes or lower-traffic streets even if they’re slightly longer. Riding defensively—assuming drivers don’t see you—keeps you safer than assuming right-of-way. Take a cycling safety class if available in your area; skills learned will serve you throughout your commuting life.
Q: What components are worth upgrading on my commuter bike setup?
Priority upgrades that improve your daily bike ride include: better tires with puncture protection (eliminating flats saves huge hassle), a comfortable saddle matched to your anatomy, quality lights if not included, and fenders if your bike lacks them. For drivetrain improvements, a wider-range cassette helps with hills, or consider upgrading to an internally geared hub for reduced maintenance. A carbon fork can smooth harsh road vibrations if your commute covers rough pavement. Don’t chase lightweight components—durability and reliability matter far more for commuters than saving a few grams. Focus upgrades on comfort and dependability rather than performance metrics irrelevant to getting to work reliably.